#AndroidStudio ตอนที่ 5 สร้างปุ่ม Close App แบบ VectorDrawable
ตัวปุ่มภาพหามาได้หลายวิธี และการสั่งเรียกบทความต่างกัน
<introduction>
เคยเห็นแอพทั่วไป มีปุ่ม Close และเรียก String มาแสดงเยอะหน่อย
เมื่อมองหาแอพเริ่มต้น เพราะผมจะไม่เริ่มต้นกับแอพเปล่าแน่
เนื่องจาก Android Studio เค้ามีโครงมาให้แล้ว
แล้วก็ได้พบกับ Project เริ่มต้นชื่อ Bottom Navigation Activity
ที่เตรียมปุ่มมาให้ใน NavigationView จำนวน 3 ปุ่ม
ผมจึงเปลี่ยนภาพจากปุ่ม Home เป็นภาพปุ่ม Close
ตัวภาพเป็นแฟ้มแบบ xml หรือที่เรียกว่า VectorDrawable
มีฐานมาจากภาพแบบ SVG หรือ PNG ยิ่งค้น และอ่านก็ยิ่งสนุก
เพราะมีทางเลือกให้หลายทาง
แต่ Android Studio เตรียมภาพไว้ให้ตั้ง 923 ภาพแล้ว
พอได้ภาพถูกใจแล้ว แล้วก็ใส่ Activity คือ สั่ง close application
ส่วนอีก 2 ปุ่มให้เรียกบทความที่ 610 กับ 611 มาใส่ใน TextView และมี ScrollView
ตามที่เคยเล่าในตอนที่ 4 แล้วนั้น
</introduction>
<process>
กระบวนการในการพัฒนา APP
เพื่อสั่งให้ปุ่มทำงาน และการเลือกภาพประกอบปุ่มที่เป็น VectorDrawable จาก SVG ในหลายวิธี และแสดงบทความตามปุ่มที่กด
มีขั้นตอน ดังนี้
1. เลือกสร้าง New Project แบบ Bottom Navigation Activity
ชื่อ controlbutton
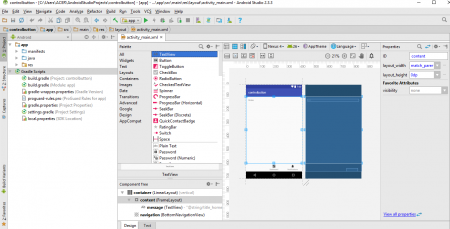
แล้วเข้าไปสำรวจใน activity_main.xml ดูใน ComponentTree
พบ Tag ที่เค้าสร้างไว้ 4 Tag
โดย Tag ที่คุมทุกอย่าง คือ container (LinearLayout)(vertical)
ประกอบด้วย content(FrameLayout) กับ navigation (BottomNavigationView)
และพบ message(TextView) อยู่ใน content(FrameLayout)
สั่ง Build APK ก็ไม่พบปัญหาอะไร และ run ได้ปกติ มีกำลังใจแล้วครับ
https://gist.github.com/thaiall/c7c45d52676a4961293a6a774da3bda0
2. การใส่ Data ใน TextView เพื่อจะได้สั่ง Scroll แบบ Vertical ไปดูด้านล่างได้
เริ่มจากสร้าง
<string name=”data1″>ข้อมูลที่นี่ มาจากกบทความ 611</string>
ใน app, res, values, strings.xml
แล้วเรียกใช้ใน TextView ว่า android:text=”@string/data1″ />
3. แม้จะมีข้อมูลมากพอแล้ว แต่ผลการทดสอบพบว่า Scroll ไม่ทำงาน
หน้าจอยังไม่รองรับการ Scroll ไปหาข้อมูลส่วนที่เหลือไม่ได้ เห็นหน้าเดียว
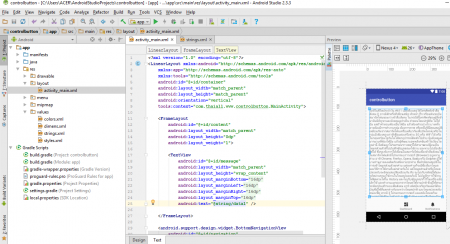
แก้ไขโดยเปิดแฟ้ม activity_main.xml
แล้วเพิ่ม ScrollView คลุมหัวท้ายของ TextView
<ScrollView android:layout_width=”wrap_content” android:layout_height=”wrap_content”>
<TextView … ที่นี่ />
</ScrollView>
4. ในกล่อง BottomNavigationView บน Smartphone หรือ Emulator
จะพบ 3 Icon ด้านล่าง : Home + Dashboard + Notifications
แต่คลิ๊กเข้าไปก็เห็นว่าข้อความใน TextView เปลี่ยนไปตามปุ่มกดเท่านั้น
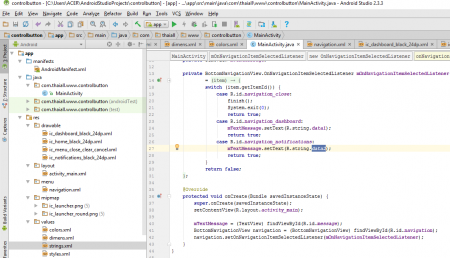
ไปดูในแฟ้ม MainActivity.java พบส่วนหนึ่งของ code
ที่สั่ง setText ให้เปลี่ยนไปตามการ switch ของ ItemId ที่รับมา
แล้วพบการประกาศ title_home หรือ R.string.title_home
ถูกกำหนดไว้ในแฟ้ม strings.xml เช่นเดียวกับตัวอื่น และ data1
จะเปลี่ยนคำว่า home เป็น close ก็ต้องเปลี่ยนที่แฟ้มนี้ด้วย
5. ถ้าเปลี่ยนจากปุ่ม home เป็น close ต้องทำดังนี้
– ใน app,res,values,strings.xml เปลี่ยนจาก home เป็น close ให้หมด
– ใน app,java,[package name],MainActivity.java เปลี่ยนจาก home เป็น close ให้หมด
– ใน app,res,menu,navigation.xml
เปลี่ยนจาก home เป็น close ให้หมด ยกเว้น @drawable/ic_home_black_24dp
เพราะใน project ยังไม่มีภาพ close เลย
6. เกี่ยวกับภาพปุ่มแบบ Vector มีเรื่องเล่าดังนี้
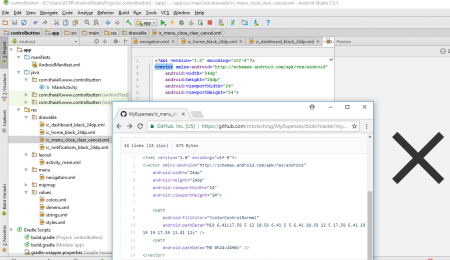
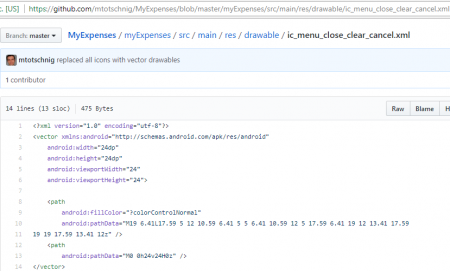
6.1 เปิดเว็บไซต์ค้นหาภาพปุ่ม close แบบไม่ต้องลงมือทำเอง
พบ https://github.com/mtotschnig/MyExpenses/blob/master/
พบแฟ้มภาพ ic_menu_close_clear_cancel.xml
ให้ copy code ไว้
แล้ว right click เหนือคำว่า drawable, new, file
แล้วพิมพ์ชื่อแฟ้ม ic_menu_close_clear_cancel.xml
ให้ paste code ลงไปในแฟ้มที่สร้างใหม่ จะเห็นรูปกากบาทใน preview ทันที
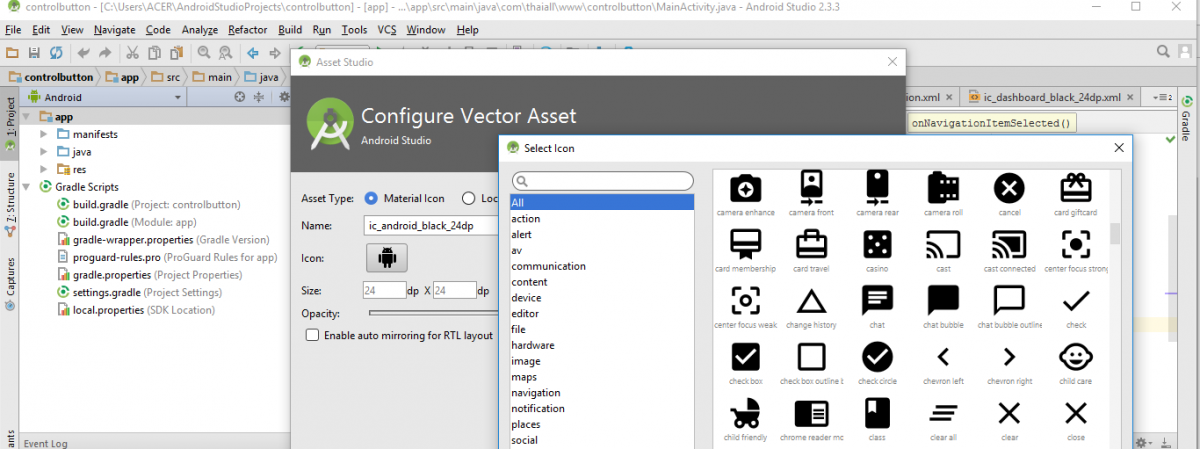
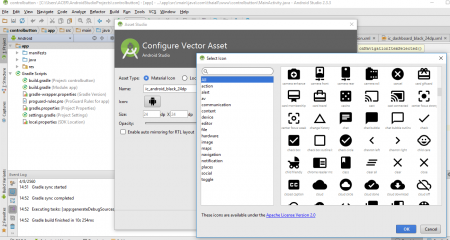
6.2 ใน Android Studio มีบริการ icon ให้เลือกเพียบ
Right click บน app, New, Vector Asset, Material icon
คลิ๊กภาพ Android ที่อยู่หลังคำว่า icon มีให้เลือก 923 ภาพ
ถ้าเลือกแบบ chevron left แล้วกด next ก็จะได้ภาพ
ไปอยู่ใน app, res, drawable
และ These icons are available under the Apache License Version 2.0
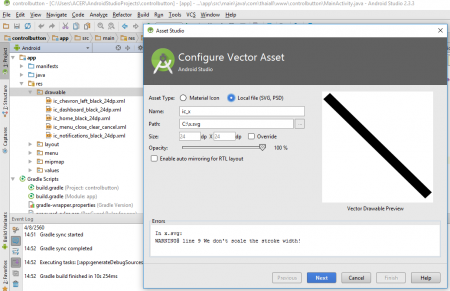
6.3 หากไปได้แฟ้มภาพ .svg ที่สร้างจากที่อื่นมาแล้ว
ก็นำเข้าผ่าน Android Studio ได้โดยง่าย
ในหน้า Vector Asset ก็เลือก Local File
เลือกแฟ้มจากในคอมพิวเตอร์ แล้วกด next ก็จะได้ภาพ
ไปอยู่ใน app, res, drawable เช่นกัน
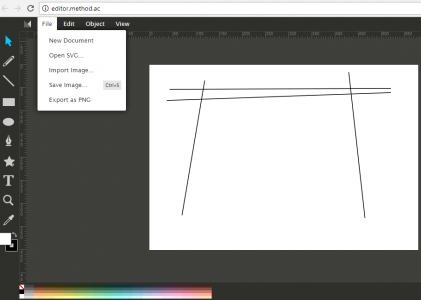
6.4 ข้อมูลภาพแบบ Vector Drawable ที่เห็นกันนี้วาดเองก็ได้
มี Tool สำหรับวาดแบบ Online
ที่ http://editor.method.ac/ สั่ง Save ได้แฟ้ม .svg
แล้วแปลงแฟ้ม .svg เป็น xml สำหรับ android
ที่ http://inloop.github.io/svg2android/
<?xml version=”1.0″ encoding=”utf-8″?>
<vector xmlns:android=”http://schemas.android.com/apk/res/android”
android:width=”24dp”
android:height=”24dp”
android:viewportWidth=”24″
android:viewportHeight=”24″>
<path
android:fillColor=”?colorControlNormal”
android:pathData=”M19 6.41L17.59 5 12 10.59 6.41 5 5 6.41 10.59 12 5 17.59 6.41 19 12 13.41 17.59
19 19 17.59 13.41 12z” />
<path
android:pathData=”M0 0h24v24H0z” />
</vector>
7. เมื่อได้ภาพ Vector สำหรับ Android มาแล้ว
เข้า app,res,menu,navigation.xml เพื่อเปลี่ยนสิ่งที่ทำค้างไว้
มองหา @drawable/ic_home_black_24dp
เป็นเป็น @drawable/ic_menu_close_clear_cancel
ถือว่าจบขั้นตอนการเปลี่ยนภาพ icon จาก home เป็น close
8. เพิ่ม Activity ให้กดปุ่ม Close เพื่อสั่งปิด Application หรือปิดตัวเอง
เปิดแฟ้ม MainActivity.java
มองหา case R.id.navigation_close:
mTextMessage.setText(R.string.title_close);
return true;
เปลี่ยนเป็น case R.id.navigation_close:
finish();
System.exit(0);
return true;
9. ทำให้ปุ่ม สั่งเรียกบทความที่ต่างกัน ปุ่มหนึ่งเรียก 610 อีกปุ่มก็เรียก 611
ถ้ากดปุ่ม notification ใน navigation
ให้แสดงบทความที่ 611 จาก data1 เหมือนค่า default
กดปุ่ม dashboard
ให้แสดงบทความที่ 610 จาก data2
ก็ให้ไปเพิ่มบทความใน strings.xml คือ data2 เพราะ data1 มีแล้ว
แล้วมาแก้ MainActivity.java
มองหา case R.id.navigation_dashboard:
mTextMessage.setText(R.string.title_dashboard);
return true;
case R.id.navigation_notifications:
mTextMessage.setText(R.string.title_notifications);
return true;
เปลี่ยนเป็น case R.id.navigation_dashboard:
mTextMessage.setText(R.string.data1);
return true;
case R.id.navigation_notifications:
mTextMessage.setText(R.string.data2);
return true;
https://gist.github.com/thaiall/b0467ceb93699c63ca5c9ad910903921
ทั้ง project และ apk เอาไปลองกันได้ที่
https://www.4shared.com/folder/AgIkeXaS/android.html
</process>
<website_guide>
+ http://editor.method.ac/
+ http://inloop.github.io/svg2android/
+ https://github.com/mtotschnig/MyExpenses/tree/master/myExpenses/src/main/res/drawable
+ http://www.thaiall.com/android
</website_guide>
หมายเหตุ
ถ้าสนใจติดตามเนื้อหาในบล็อกนี้ สามารถ subscribe ด้วย email ที่อยู่ข้างขวา หรือ click here
